
Post Processing: Geminid Meteor Shower
The Geminid meteor shower is called the King of Meteor Showers, and I now understand why. This was my first time ever going out to watch it. Unfortunately, it happens right in the middle of December. On the night of the 13th, I went out in -30 degrees Celsius for hours capturing photos to use. Thankfully I had a fire at the bottom of the hill to keep me warm and out of the wind, but my camera was frozen before long. I went through four batteries that night. They weren’t dead, just frozen. By time the last one ran out of juice, I put the first battery back in and kept shooting.
I wanted to make sure I did this right, so I tracked 10 1 minute exposures of the sky. I shot 10 foreground photos to stack later, then I aimed at the sky and just shot continuously until I could shoot no more.

To begin with, I found a scene that I liked and shot some photos for the foreground. As you can see, The foreground is sharp, however there is motion blurring in the stars. That’s okay for now. There is quite a bit of noise in the photo. By noise, I am referring to that grain like texture you can see below.

The idea is to take a bunch of photos, so that they can be merged later to increase the quality. I used Photoshop to average out the photos. This process basically allows Photoshop to determine elements that don’t belong in a series of photos. It is done by first making sure photos were shot without moving your tripod, or otherwise aligned, then combining them into a smart object. You can then set the stack mode to median and you're well on your way. Bonus tip: this can also be used to remove people from touristy places.


The result here is that the foreground is still decently detailed, but we’ve cleaned the quality right up. Next, just for extra precaution, I ran the foreground image through Topaz DeNoise AI to further reduce noise. It worked wonders.

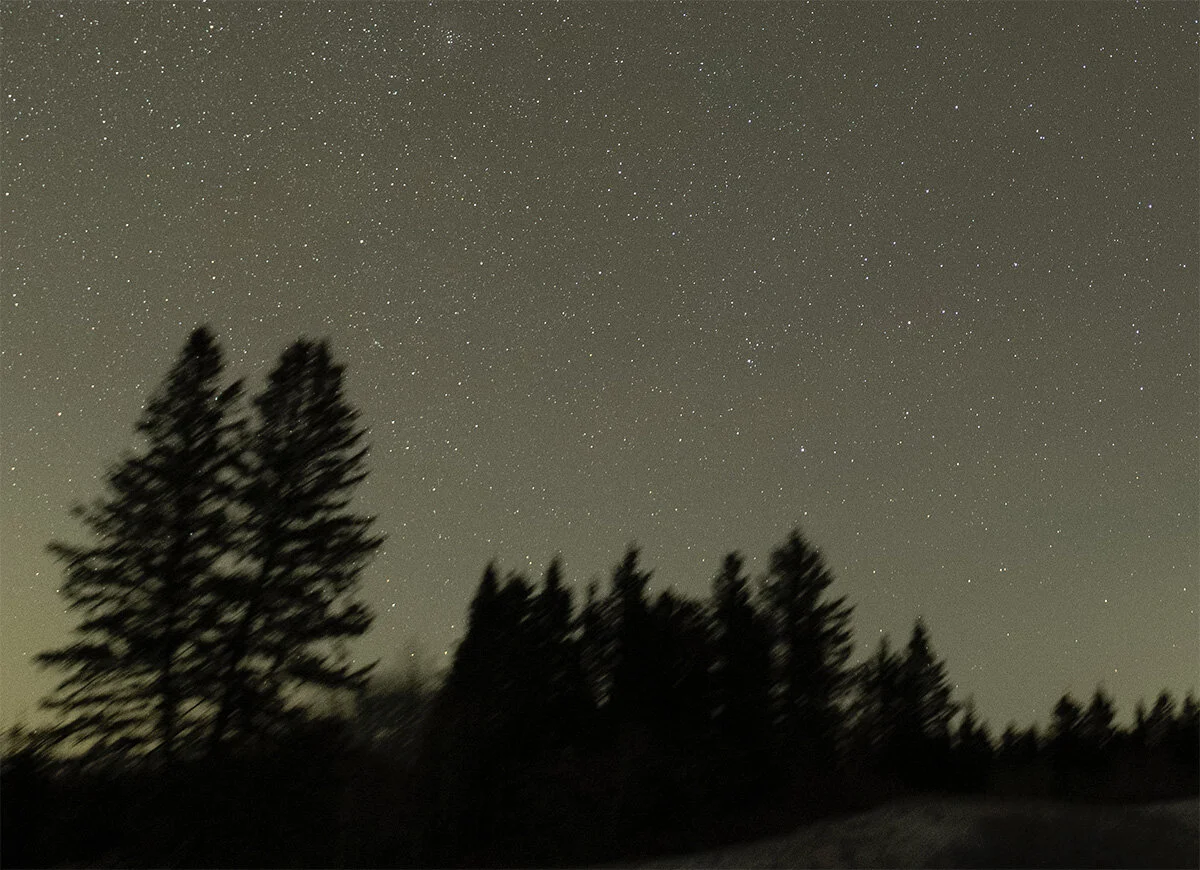
The foreground was now more or less complete. A few tonal and colour adjustments later, it’s time to work on the sky. The image below shows the reverse of the foreground raw data. In this case, the stars are sharp, but there is motion blur in the trees.
The reason for this is I set up my camera on a device called a star tracker. The stars are so far away that they are essentially stationary. If you set up your camera on a tripod normally, you’ll end up getting motion blurred stars if your exposure is too long because the Earth is rotating. The star tracker rotates in the opposite direction to zero out the movement. in this photo, the stars are stationary, but the Earth is moving.
I took about 10 images like this. It’s an extra step, but it makes a huge difference. Again, the reason is largely reducing noise and increasing the overall quality of the image. I use a program called SiriL. It’s a free software for Mac and has delivered good results for me so far. After loading all the images into the program, it goes through its registration process which identifies the brightest stars in the image and then aligns them.


The two images above are the registration process, and the sky after the images have been stacked. This process is not necessary, but it makes a huge difference in terms of quality. Night images tend to have lots of noise and this reduces or eliminates it completely. It also helps to bring out faint details that might be more difficult to pick up. With only 10 minutes of integrated exposure, I stacked mostly for noise reduction.
Now I have my foreground ready and my sky stacked, I need to put them together. For me, I use something called a luminosity mask that selects pixels based on brightness. My point of most contrast is right on the horizon, so this is relatively easy to select, then paint white on the sky and black on the ground. The mask gets applied to the sky to that areas in white show through, though areas in black are blocked and will show what’s on the layer beneath. In this case, my foreground.

Now that I’ve got my image more or less put together, it’s time to start adding the meteors back in. I had 50+ meteors of varying sizes captured on camera throughout the evening. Since I just left my camera shooting, I ended up with a total of over 500 images. I ended up deleting about 375 of them. For blending the meteors in, I went through them frame by frame to select the ones I wanted. I cropped them down and pumped up the contrast. This makes them brighter and the sky around them darker. I drop each individual meteor on to my blended image and set the layer blend mode to Lighten so that the dark areas show what’s beneath leaving only the meteor and stars visible. I mask out the stars and just have the meteor left.


Once I finished up blending in all my meteors, I temporarily drew a circle on my image. The circle was to the left of Orion where the Gemini constellation is and the radial point where all the meteors are coming from. The last step was to move them around so they appear somewhat random, but also clearly coming from a particular source.
